10 Fun DIY Garden Markers to Personalize Your Plants
Ready to make your garden truly yours? Personalizing your plants with DIY garden markers is a fun way to add flair and organization to your green space. In this post, I’ll show you ten creative ideas that use simple materials. You’ll not only learn how to craft them easily, but also how they can brighten up your garden. Let’s dig in and give your plants their unique identity!
Introduction to DIY Garden Markers: Benefits of Personalizing Your Plants

Making your own garden markers brings joy. You can express your style and creativity. Personalizing your plants helps you remember what you grow. It makes your garden feel special and unique. Each marker tells a story about the plant it labels.
Using DIY garden markers is also fun. You can invite friends and family to join. This can turn into a lovely bonding activity. Plus, it’s a great way to recycle materials. You can use items you already have at home. This helps the planet and saves money.
Personalized markers can also enhance your garden’s beauty. Bright colors and creative designs catch the eye. They can turn a simple garden into a stunning display. Overall, DIY garden markers add joy to gardening. They help you feel proud of your work.
Painted Rock Garden Markers – Step-by-Step Instructions

To make painted rock garden markers, start by finding smooth rocks. Look for rocks that are flat and easy to paint. Wash the rocks to remove dirt and let them dry completely.
Next, gather your paint. Use outdoor acrylic paint for durability. You can use brushes or sponges to apply the paint. Pick bright colors to make your markers stand out.
Once your paint is ready, think about your plant names. Write the name of each plant on a rock. Use a fine brush for neat letters. You can also add fun designs or faces to your rocks.
After the paint dries, seal the rocks with a clear outdoor sealant. This step helps protect your art from rain and sun. Finally, place your painted rocks in your garden to mark your plants.
Painted Wooden Spoon Markers – Creative Techniques

For painted wooden spoon markers, start with plain wooden spoons. You can find these at craft stores or your kitchen. Clean the spoons if needed.
Choose your colors and paint the spoon heads. Use bright outdoor paint for a fun look. You can paint the entire head or just the tip.
To add plant names, use a fine-tip marker or paint. Write clearly so you can read the names. You can also draw simple pictures of the plants.
Once dry, you can add a coat of clear sealant. This helps the paint last longer. Place your wooden spoon markers in the soil next to your plants.
Repurposed Fork Garden Markers – Easy How-To Guide

Repurposing forks is a fun way to create garden markers. Start by finding old forks that you no longer use. Make sure they are clean and free of rust.
Next, bend the fork tines back slightly. This helps the fork stand better in the soil. You can use pliers to make this easier.
Then, write your plant names on the fork handles. Use a permanent marker for clear writing. You can also paint the handles with colorful paint for a fun touch.
After you finish, place the forks in the garden soil. They will not only mark your plants but also add a quirky charm to your garden.
Idea 4: Clay Pots as Garden Markers – Customization Tips

Using clay pots as garden markers is fun and easy. You can choose small pots or cut larger ones in half. Start with clean pots. Paint them with bright colors to make them pop. You can use outdoor paint for better durability.
Next, write the plant name on the pot. Use a paint pen for neat letters. You can also add fun drawings, like flowers or bugs. Let the pots dry completely. Once dry, fill them with soil and place them next to your plants.
These markers not only look great, but they also help you remember what you planted. Plus, if you change plants, just repaint! This makes them very versatile and reusable.
Idea 5: Chalkboard Paint Garden Markers – Versatile Designs

Chalkboard paint is a clever way to make garden markers. You can use wood pieces, rocks, or even metal. Start by painting your surface with chalkboard paint. Let it dry for at least two hours.
Once dry, write the plant name with chalk. This allows you to change the names anytime. You can even use colorful chalk for a fun look.
To make these markers last longer, seal them with a clear spray. This protects the paint from rain and sun. These markers are great for temporary plants or for those who change their garden often.
Idea 6: Wine Cork Garden Markers – Eco-Friendly Options

Wine corks are a clever choice for garden markers. They are eco-friendly and easy to find. Start by gathering corks from your favorite wine bottles.
Use a sharp knife to cut a small slit on one side of each cork. This is where you will slide in a piece of paper. Write the plant name on the paper and slide it into the cork.
Stick the cork in the soil next to your plant. These markers are unique and add charm to your garden. Plus, they help reduce waste by reusing something you might throw away.
Idea 7: Mosaic Tile Garden Markers – Crafting with Color

Mosaic tile garden markers add a splash of color to your garden. You can use small, broken tiles or colorful glass pieces. Start by choosing a base for your marker, like a flat stone or a piece of wood.
Next, glue the tiles onto your base. You can create any design you like. Once the glue dries, fill in the gaps with grout. This helps hold the tiles in place. After the grout dries, seal your marker with a waterproof sealant.
Finally, write the plant name on the marker with a permanent marker. You now have a colorful, unique marker to show off your plants.
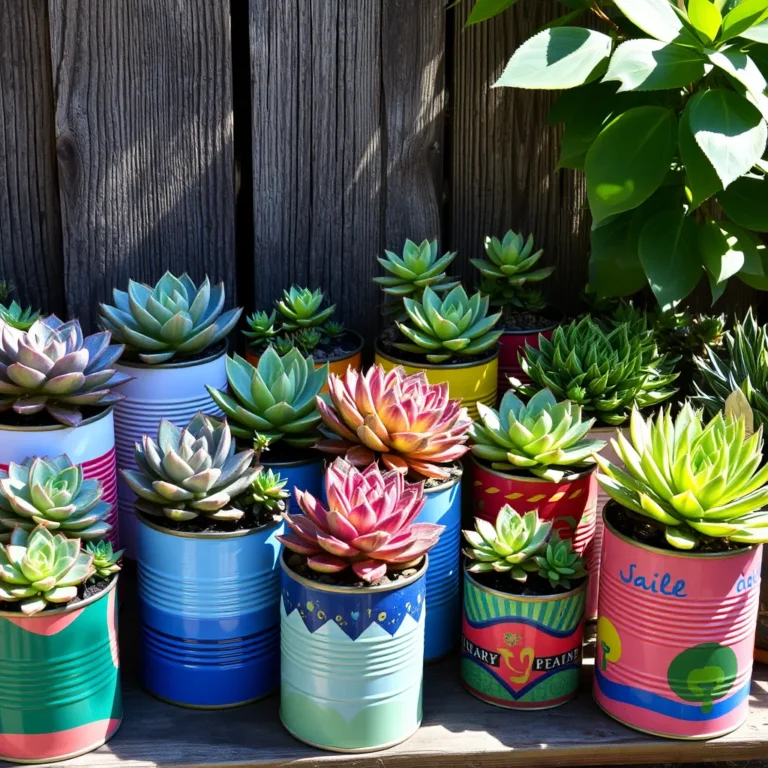
Idea 8: Upcycled Tin Can Markers – Rustic Charm

Upcycled tin can markers bring a rustic charm to your garden. To start, find some empty tin cans. Clean them well and remove any labels. You can use a hammer and nail to make holes for drainage.
Next, paint the outside of the can with outdoor paint. Let it dry before adding your design. You can use stencils or freehand the plant names. For added flair, you can tie a piece of twine around the top. This gives a nice touch!
Fill the can with soil and plant your seeds. These markers are simple, cheap, and add character to your garden.
Idea 9: PVC Pipe Garden Markers – Long-Lasting Solutions

PVC pipe garden markers are durable and easy to make. Start with a piece of PVC pipe about 12 inches long. Cut it to your desired length if needed.
Next, use a permanent marker or paint to write the plant names on the pipe. You can also add fun designs or colors. Once done, simply stick the pipe into the ground next to your plants.
These markers will last for years and stand up to the weather. If you need to change the name, just wipe it clean and write a new one.
Idea 10: Fabric Garden Markers – Sewing and Personalization Process

For fabric garden markers, start with some sturdy fabric. You can use cotton or canvas. Cut the fabric into small rectangles. Each should be about 3 by 5 inches. Next, grab a marker or fabric paint. Write the name of each plant on one side.
To make them last, use a sewing machine or hand stitch around the edges. This will help keep the fabric from fraying. You can also add fun designs, like flowers or bugs. This makes each marker special.
Once you finish sewing, attach the markers to sticks or skewers. Simply poke the stick into the ground next to your plant. These markers are both cute and useful. They add color to your garden while helping you remember what you planted.
Tips for Choosing Effective Labels for Your DIY Garden Markers

When you pick labels for your DIY garden markers, think about a few key things. First, choose a clear font. You want to read the plant names easily. Second, pick colors that stand out against your soil and plants. Bright colors work well.
Next, consider the weather. Use materials that can handle rain and sun. Waterproof paint or fabric is a good choice. Lastly, think about the size of the label. Make sure it’s big enough to see but not too big to crowd your garden.
How Personalized Garden Markers Enhance the Gardening Experience

Personalized garden markers can make your gardening time more fun. They help you keep track of your plants. You know what you planted and where it is. This saves you time when watering or caring for them.
These markers also show your style. You can make them bright, funny, or sweet. Each marker reflects your personality. Plus, they can spark conversations with friends who visit your garden. They might ask about your plants and your cool markers.
In a way, these markers turn your garden into a unique canvas. Each marker tells a story. It makes your gardening journey more enjoyable and memorable.
Ideas for Organizing Your Garden Markers by Plant Type

You can group your garden markers by plant type. This helps you find them fast. Here are some fun ideas:
– Vegetable Markers: Use bright colors for your vegetable plant markers. Think yellow for corn and green for beans. You can also add a picture of each veggie.
– Herb Markers: Make herb markers small and neat. You can use wooden sticks or stones. Label them with easy names like mint or basil.
– Flower Markers: Use cheerful designs for flowers. Think about using pastels or bright colors. You might even draw a small flower next to the name.
– Fruit Markers: Use fun shapes for fruit plants. You can cut markers in the shape of fruits like apples or strawberries. This makes it clear which plant is which.
– Cacti and Succulents: These plants can have a desert theme. Use sandy colors or tiny rocks as markers. Keep the labels simple but bold.
This system keeps your garden neat and colorful. It also helps you care for your plants better.
Conclusion
In this blog post, we explored fun and easy DIY garden markers. You learned about materials needed and key safety tips for your projects. We covered ten creative marker ideas using items like rocks, forks, and wine corks. Personalizing your garden improves your experience and adds charm. Choosing the right labels helps keep your plants organized. Dive into these projects and enjoy your special garden space!