9 Budget-Friendly Outdoor Furniture Makeovers Ideas
If your outdoor space needs a refresh but you’re on a budget, you’re in the right place! In this article, I’ll share nine creative outdoor furniture makeovers that are both easy and wallet-friendly. From transforming worn wooden chairs to crafting cozy pallet sofas, these projects will give your patio a stylish boost. Get ready to unlock your creativity and turn your outdoor area into your favorite spot!
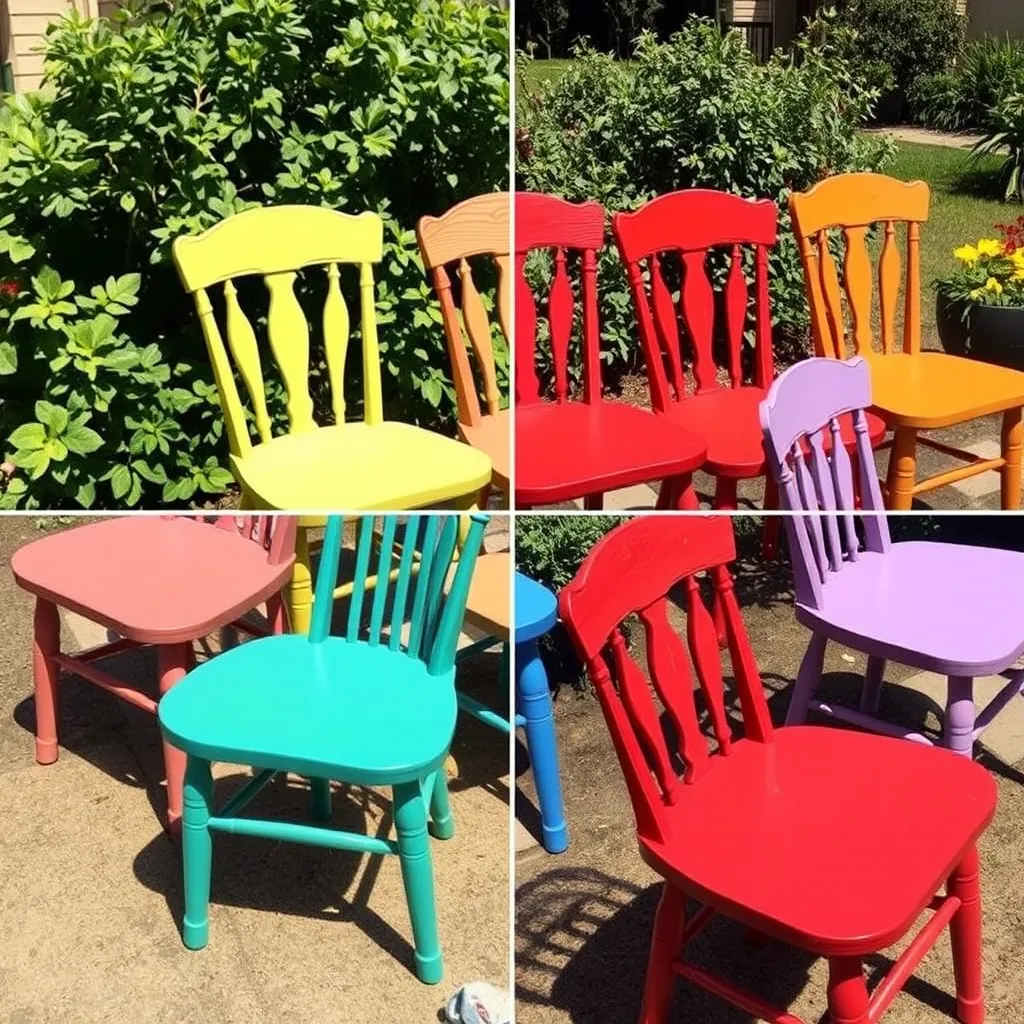
Repainted Wooden Chairs: Transforming Old Into New

To repaint wooden chairs, you need a few simple items:
– Paint
– Brushes
– Sandpaper
Step-by-Step Instructions for Painting
1. Clean the Chairs: Start by wiping down the chairs. Remove dirt and dust.
2. Sand the Surface: Use sandpaper to rough up the old paint. This helps the new paint stick.
3. Choose Your Paint: Pick an outdoor paint. Make sure it’s weather-resistant.
4. Apply a Primer: If your chairs are very old, use a primer first. This helps with coverage.
5. Paint the Chairs: Use a brush to apply the paint. Start with thin layers.
6. Let It Dry: Wait for the paint to dry completely between coats.
7. Add More Coats: Apply a second or third coat for a rich color.
Before-and-After Photos
Seeing the change is amazing. You can find photos online of this makeover. The old chairs often look dull, while the new ones shine bright. This simple project can give your outdoor space a fresh look.
Upcycled Pallet Sofa: Creating a Cozy Lounge
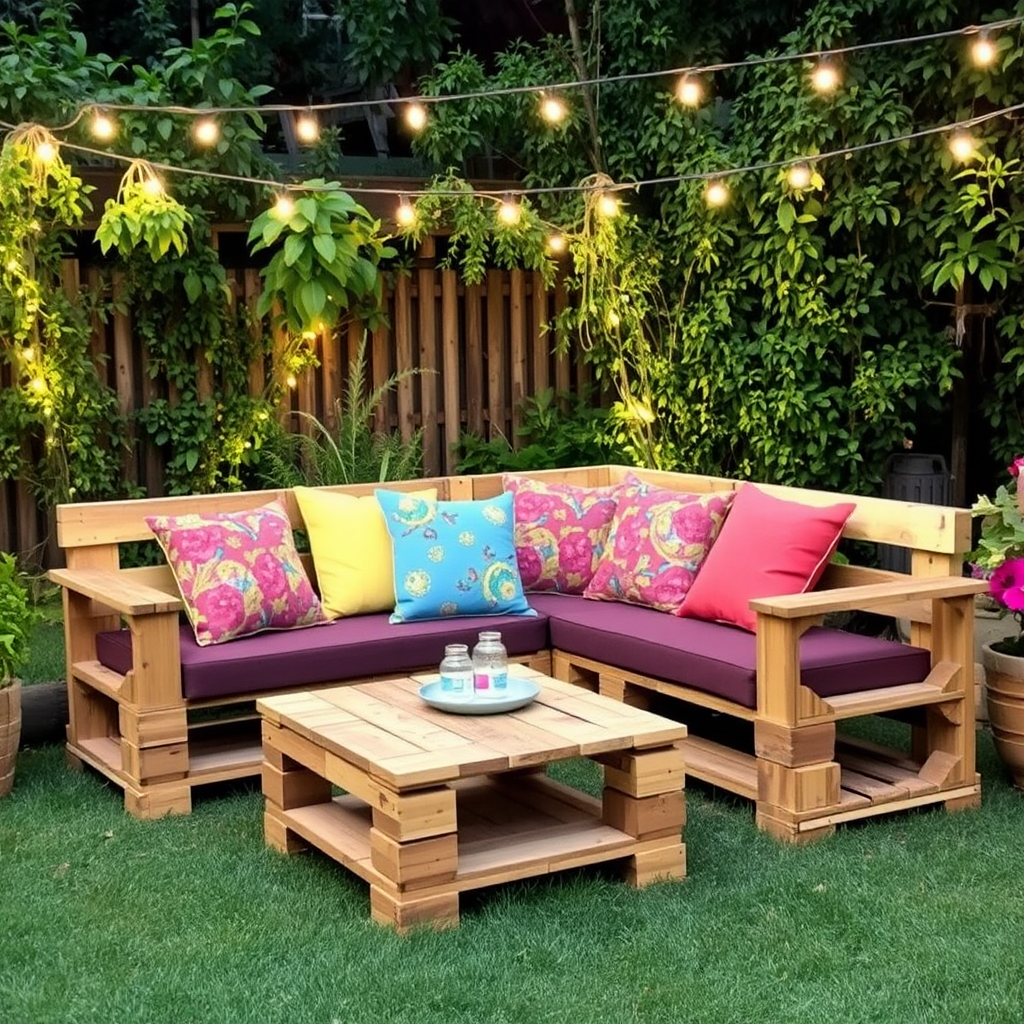
To make a sofa from pallets, start by finding the right pallets. Make sure they are clean and free from damage. Sand down any rough spots to avoid splinters. Stack the pallets for the sofa’s base. You can use two or three pallets high.
Next, attach the pallets using screws for strength. This step keeps your sofa stable and safe. For comfort, add cushions on top. You can buy cushions or make your own. Choose a waterproof paint to protect the wood. This keeps your sofa looking fresh and new.
List of Materials
– Pallets
– Cushions
– Waterproof paint
Once you finish, your sofa will look inviting. I recommend placing it in a shaded spot. Add some outdoor lights around to enhance the vibe. Your cozy lounge will be the perfect place to relax.
Fabric-Covered Ottomans: Adding Color and Comfort

To add color and comfort to your outdoor space, try fabric-covered ottomans. They are easy to make and can brighten any area. Start by choosing a fun fabric that matches your style. Look for durable, outdoor-friendly material that can resist weather.
Guide to Selecting and Attaching Fabric
When selecting fabric, focus on patterns and colors that excite you. You want a fabric that fits the theme of your outdoor area. After choosing your fabric, you will need to cut it to size. Make sure to leave extra fabric for folding over the edges. Use a staple gun to attach the fabric to the ottoman. Pull the fabric tight for a smooth look. Tuck the corners neatly for a polished finish.
Tools Needed
– Staple Gun
– Fabric
– Scissors
Having the right tools makes the job easy and fun. A staple gun is key for a firm hold. Use sharp scissors to cut the fabric cleanly. These tools will help you achieve a great look.
Transformation Photos to Showcase Results
Before you start, take photos of your ottoman. After you finish, take more photos to show the change. These pictures can inspire others and show off your hard work. Sharing these photos can help others see how easy it is to make their own fabric-covered ottomans.
DIY Planter Table: Multi-Functional Outdoor Solution
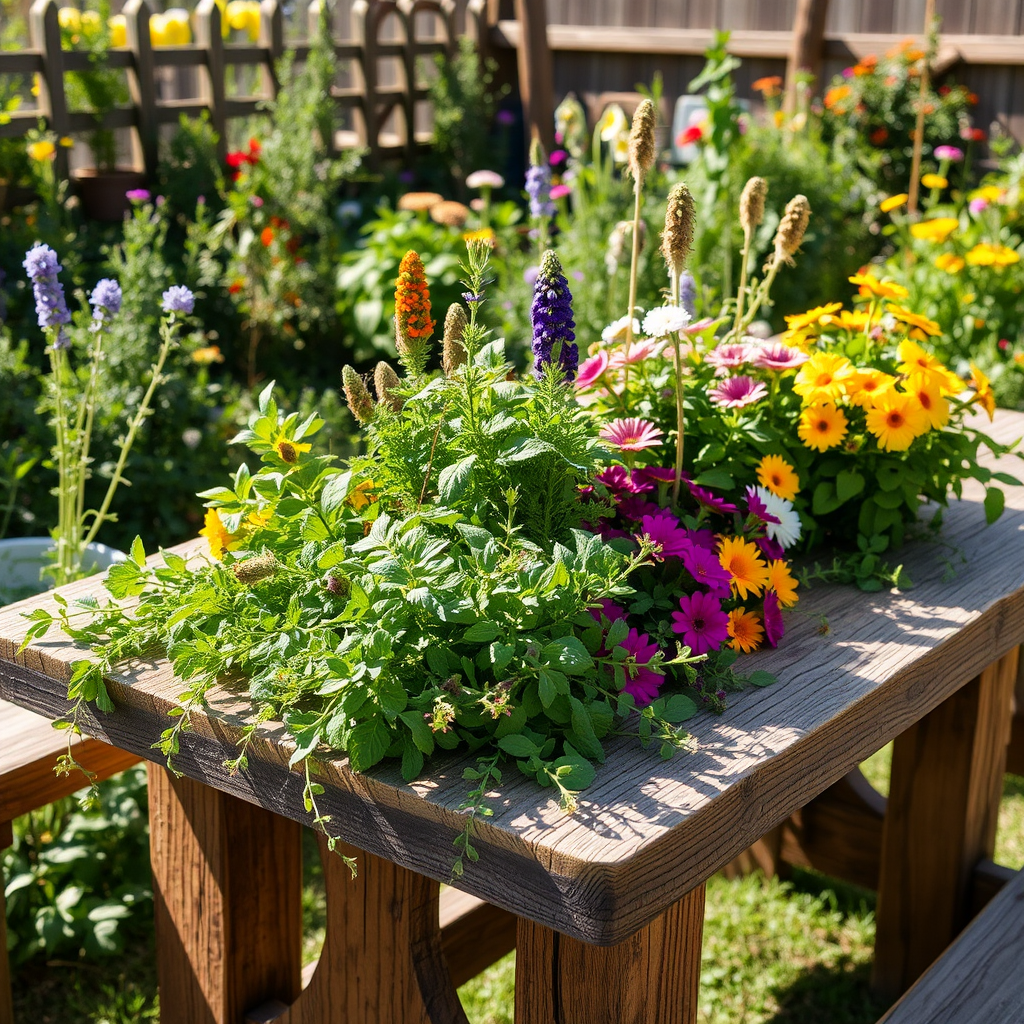
Building a planter table is fun and easy. It gives you a table and plants in one. Start by cutting wood for the table frame and the planters. Use screws to hold everything together. You can find many plans online to guide you.
Material List
– Wood
– Screws
– Plants
Tips for Plant Selection
Choose plants that fit your space. Consider herbs for cooking or flowers for color. Make sure to pick plants that thrive in your climate. A mix of colors can make your table pop. Don’t forget to pick plants that need the same amount of water. This makes caring for them easier.
Rope-Wrapped Furniture: Adding Texture and Style
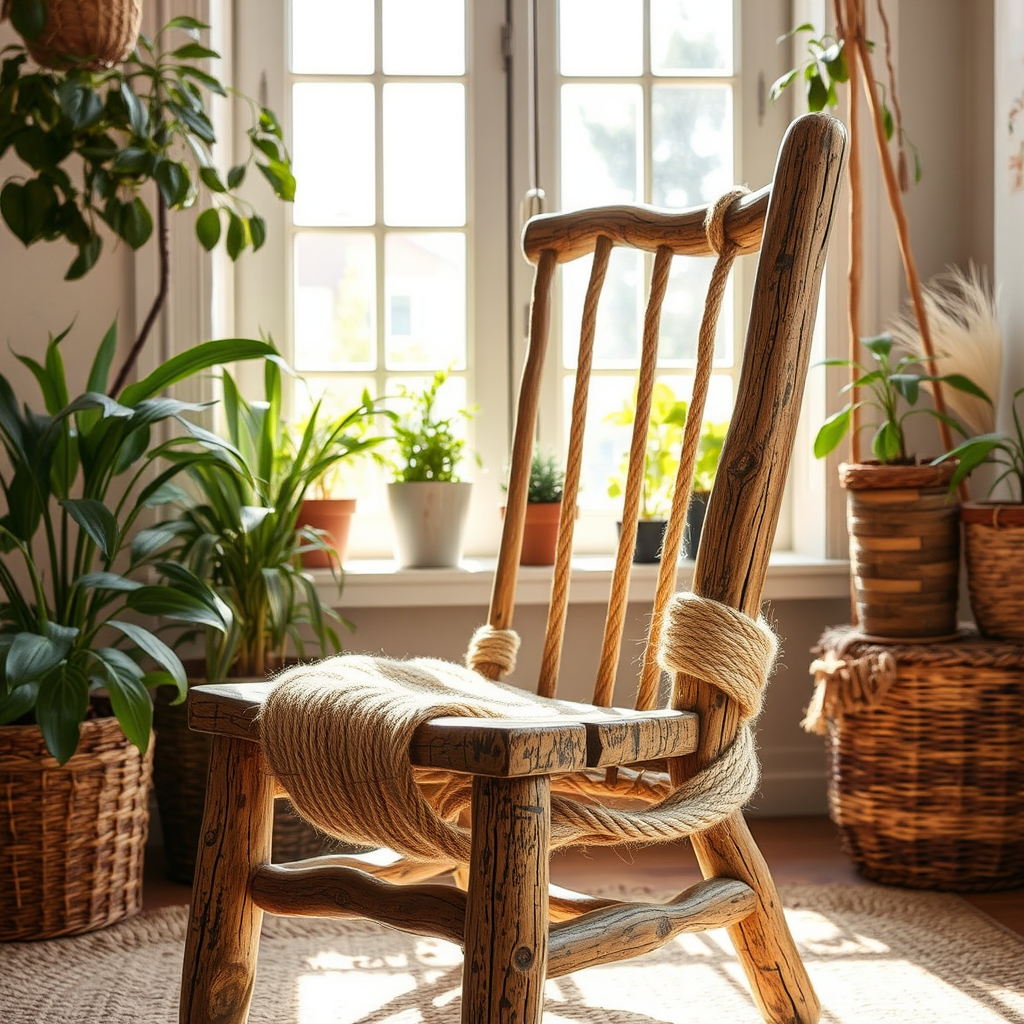
Rope-wrapping furniture adds a unique touch. It gives a cozy and rustic feel. You can wrap chairs or tables easily.
Step-by-Step Guide to Wrapping Chairs or Tables with Rope
1. Choose your piece: Pick a chair or table you want to transform.
2. Clean the surface: Wipe it down to remove dust and dirt.
3. Start wrapping: Secure one end of the rope to the furniture.
4. Wrap tightly: Go around the piece, keeping the rope close together.
5. Secure the end: Once finished, glue the end of the rope to hold it.
Essential Materials
– Rope
– Glue
– Scissors
Showcasing the Finished Look
The end result is stunning. You will love how the rope adds depth and charm. It turns any plain furniture into a stylish statement piece.
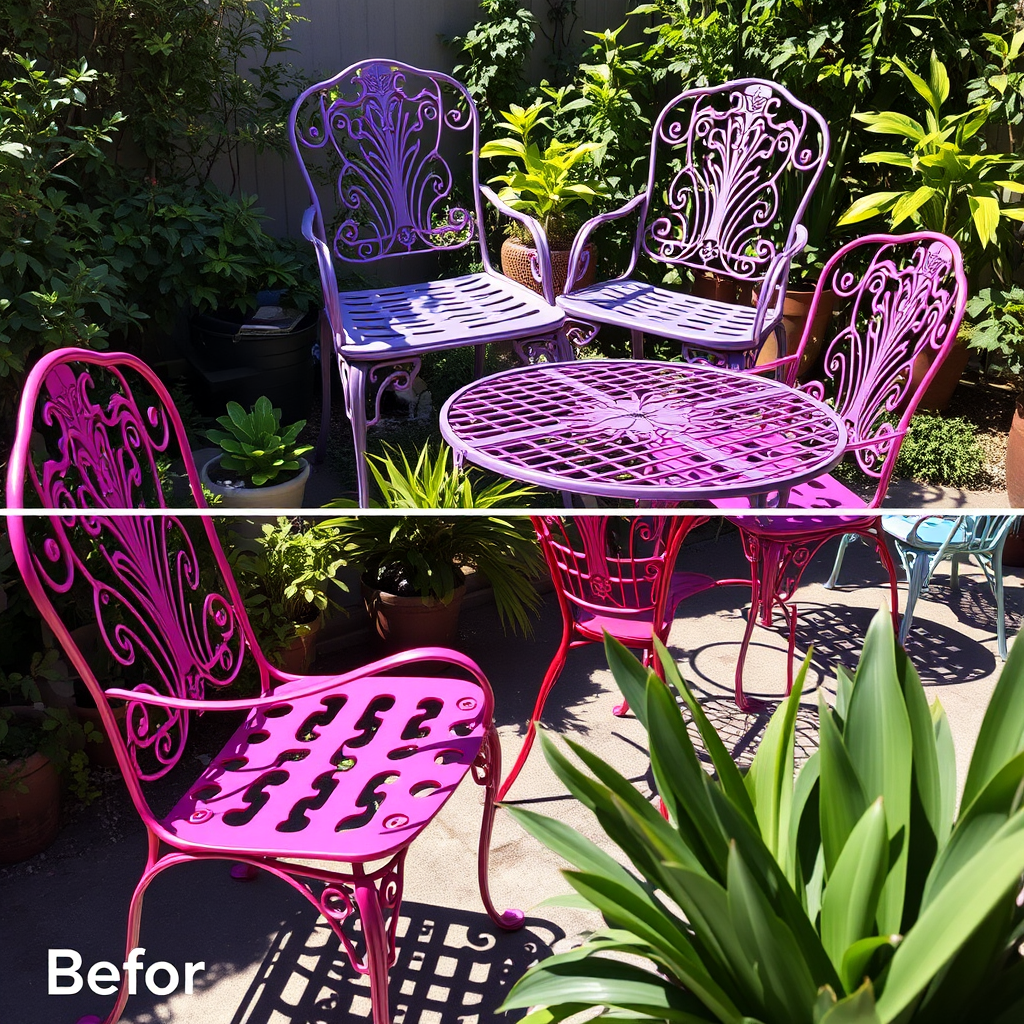
Spray-Painted Metal Furniture: A Fresh Look
Choosing the right spray paint for metal is key. Look for paint made for metal surfaces. It should stick well and resist rust. Brands like Rust-Oleum or Krylon work great.
Before you start, clean the metal furniture. Wash it with soap and water. Remove any rust or old paint using sandpaper. Make sure the surface is dry.
When you’re ready to spray, do it in a well-ventilated area. Hold the can about 6 to 12 inches away. Apply light, even coats. Let each coat dry before adding another. Two to three coats usually give the best finish.
After your project, the contrast of the before and after is striking. Old, dull metal can turn into a bright, new piece. It changes the look of your outdoor space. You will love how it feels fresh and inviting.
Vintage Suitcase Side Tables: Unique and Functional
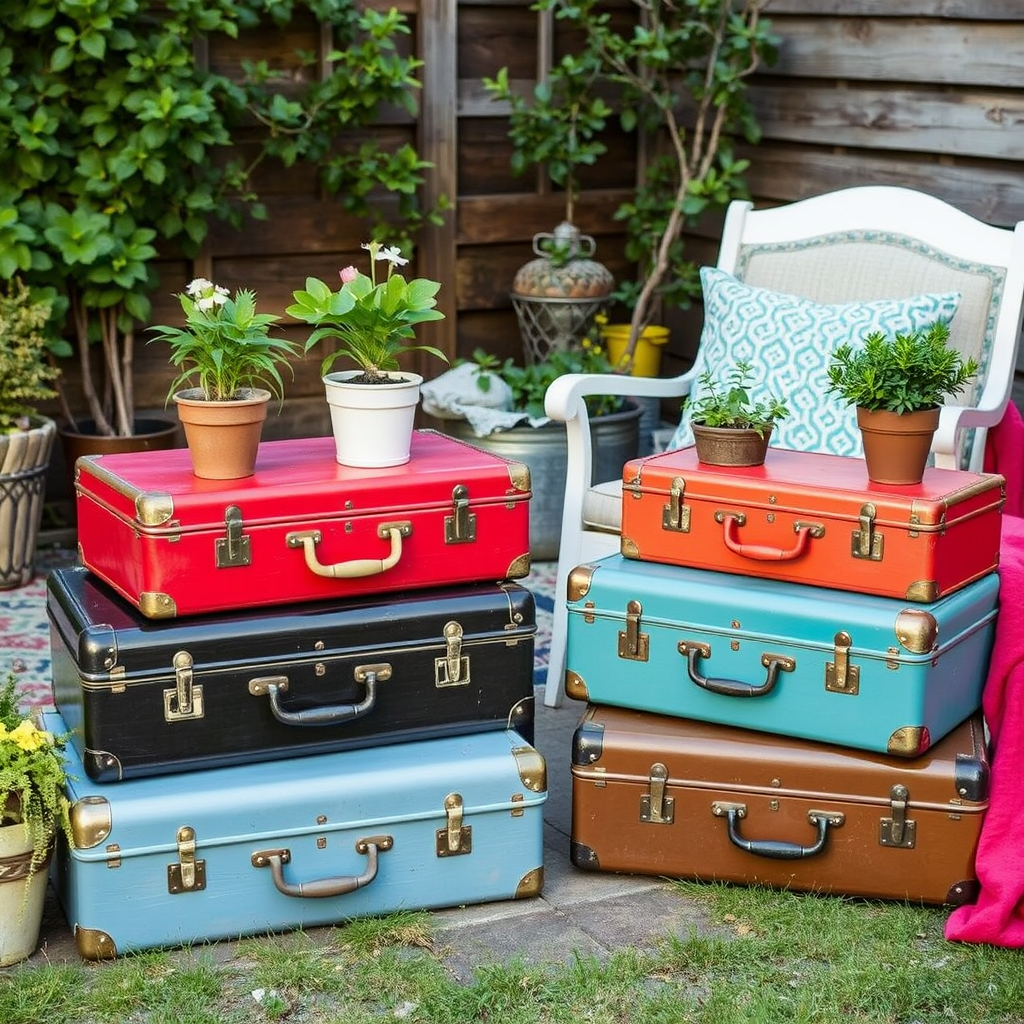
Finding vintage suitcases is fun. Check thrift stores, garage sales, and flea markets. You want sturdy suitcases that have charm. Look for ones with interesting colors or patterns. Once you find your suitcases, clean them well. Remove any old stickers or dirt.
Next, you need to add legs to your suitcase. You can use wooden legs or metal hairpin legs. Measure carefully to ensure they fit. Drill holes in the suitcase to attach the legs. Use screws or brackets to secure them tightly.
Material List
– Suitcase
– Legs
– Hardware (screws, brackets)
After you build your side tables, style them outdoors. Place them next to your favorite chair or sofa. You can use them to hold drinks, snacks, or books. They add character to your space.
For inspiration, check out photos of setups in gardens, porches, or patios. Each picture shows how creative you can be with vintage suitcase side tables. They look cute and are very functional.
DIY Outdoor Cushions: Customizing Comfort
To make your outdoor space comfy, try sewing your own cushions. This task may sound hard, but it is easy and fun. You can pick any fabric you like. Your choices can show off your style.
Guide to Sewing Basic Outdoor Cushions
First, measure the chairs or benches you want to cushion. Cut your foam to fit these sizes. Next, cut your fabric, leaving extra for seams. Sew three sides together, then insert the foam. Finally, sew the last side shut.
List of Required Materials
– Fabric
– Foam
– Sewing machine
– Scissors
– Measuring tape
– Pins
Examples of Various Patterns and Styles
You can choose bright colors for a lively look. Floral prints add a fun touch. For a classic feel, choose solid shades. Mix and match patterns for a unique twist. Your cushions can reflect your personality and make your space inviting.
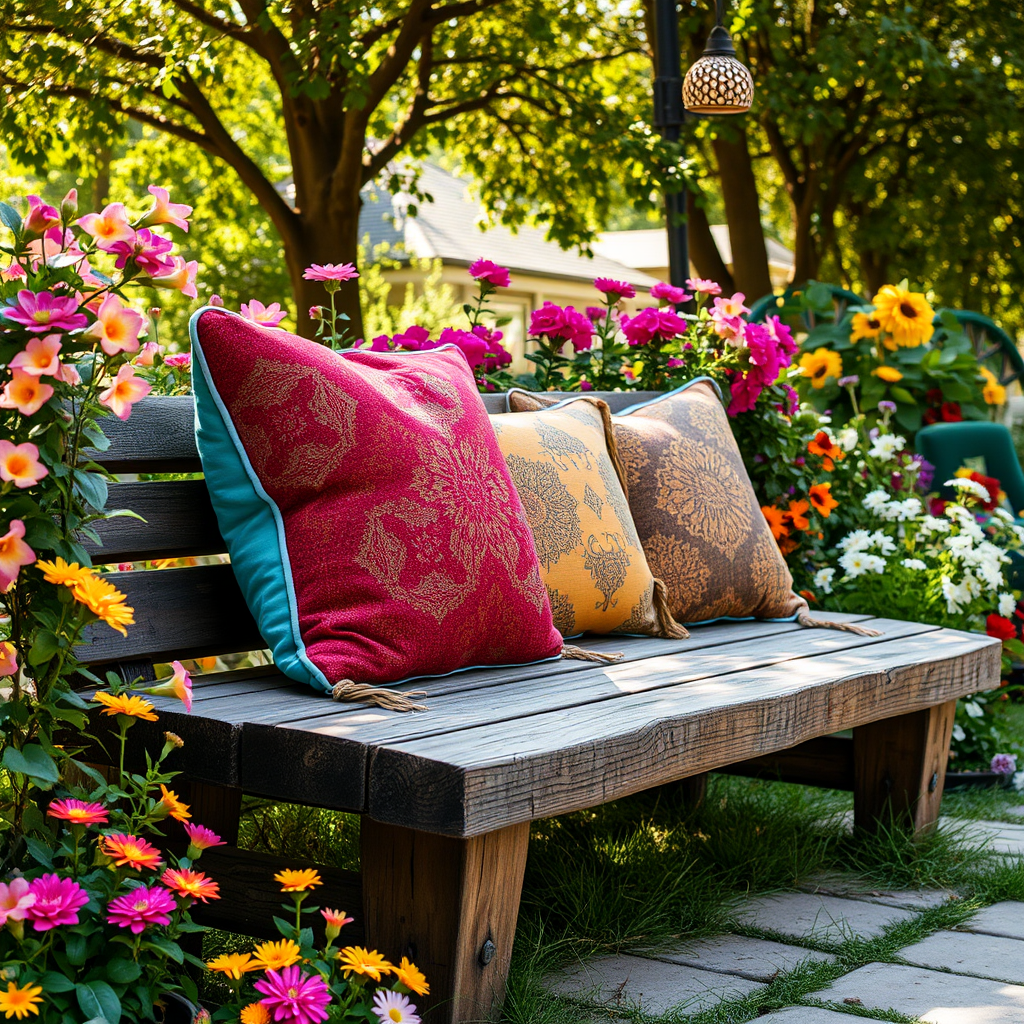
Repurposed Garden Bench: From Old to Charming

To make an old bench shine again, start by cleaning it well. Remove dust and dirt. Next, use sandpaper to smooth out rough spots. This step helps the paint stick better.
Steps for Refinishing and Redesigning an Old Bench
1. Clean the Bench: Use soap and water to scrub it. Dry it fully.
2. Sand the Surface: Sand all areas until they feel smooth.
3. Apply Primer: A good primer helps the paint last longer.
4. Paint the Bench: Choose a bright or fun color. Use a brush for detailed areas.
5. Add Accessories: Consider new cushions or decorative pillows for comfort.
Materials Needed
– Sandpaper
– Primer
– Outdoor paint
– Paintbrushes
– New cushions or pillows
Inspiring Before and After Images
Look for images online that show before and after shots. You’ll see how a little work makes a big change. A dull bench can turn into a bright focal point in your garden.
Conclusion
You can bring old items back to life through easy DIY projects. We explored how to repaint wooden chairs, create upcycled pallet sofas, and make fabric-covered ottomans. Each project uses simple tools and materials for stunning results. Picture your home filled with stylish, custom furniture that reflects your taste. Empower yourself to create these unique pieces. With just a bit of time and effort, you can transform your spaces and enjoy beautiful, functional décor.